Welcome to our comprehensive guide on replacing brake pads! As a car owner, it's important to know how to properly maintain your vehicle to ensure its safety and longevity. One of the most common repairs and maintenance tasks you will encounter is replacing brake pads. Not only is this a necessary part of car ownership, but it can also save you money by avoiding costly trips to the mechanic. In this article, we will cover everything you need to know about replacing brake pads, from understanding when they need to be replaced to step-by-step instructions on how to do it yourself.
So buckle up and get ready to become a pro at DIY car repair with our expert tips and advice. First, let's take a look at the search intent behind auto parts searches. People searching for information on auto parts are likely in need of products or services related to So buckle up and get ready to become a pro at DIY car repair with our expert tips and advice. First, let's take a look at the search intent behind auto parts searches. People searching for information on auto parts are likely in need of products or services related to car maintenance and repair. They may be looking for specific parts for their vehicle or general information on auto accessories. Some may also be seeking tips and techniques for maintaining their car or repairing it themselves. So buckle up and get ready to become a pro at DIY car repair with our expert tips and advice. First, let's take a look at the search intent behind auto parts searches. People searching for information on auto parts are likely in need of products or services related to car maintenance and repair. They may be looking for specific parts for their vehicle or general information on auto accessories. Some may also be seeking tips and techniques for maintaining their car or repairing it themselves. and repair. They may be looking for specific parts for their vehicle or general information on auto accessories. Some may also be seeking tips and techniques for maintaining their car or repairing it themselves. So buckle up and get ready to become a pro at DIY car repair with our expert tips and advice. First, let's take a look at the search intent behind auto parts searches. People searching for information on auto parts are likely in need of products or services related to car maintenance and repair. They may be looking for specific parts for their vehicle or general information on auto accessories. Some may also be seeking tips and techniques for maintaining their car or repairing it themselves.
Understanding this intent will help guide us in providing comprehensive information on replacing brake pads. Replacing brake pads is an essential part of car maintenance, and knowing how to do it yourself can save you time and money. It is important to regularly check and replace your brake pads to ensure the safety of your vehicle and everyone on the road. Worn brake pads can lead to decreased braking performance and increase the risk of accidents. When it comes to replacing brake pads, there are a few things you need to know. First, you need to determine if your brake pads actually need to be replaced.
Signs that your brake pads are worn include squealing or grinding noises when you brake, a vibrating steering wheel, or a longer stopping distance. If you experience any of these symptoms, it is likely time to replace your brake pads. Next, you will need to gather the necessary tools and materials for the job. This includes new brake pads, a jack and jack stands, a lug wrench, and a C-clamp. It is important to have all of these items before you start the replacement process. Before you begin replacing your brake pads, make sure your car is parked on a flat surface and the engine is turned off.
Use the lug wrench to loosen the lug nuts on the wheels where you will be replacing the brake pads. Then, use the jack to lift the car and place jack stands under the car for added support. Once the car is securely lifted and supported, you can remove the lug nuts and take off the wheel. This will give you access to the brake caliper and rotor. Use the C-clamp to compress the caliper piston, which will make it easier to remove the old brake pads.
Then, remove the old brake pads and replace them with the new ones. After the new brake pads are in place, you can put the wheel back on and tighten the lug nuts. Lower the car back down and repeat the process for the other wheels. Once all of the brake pads have been replaced, you can start your car and test the brakes to ensure they are working properly. In addition to providing step-by-step instructions for replacing brake pads, we also want to provide tips and techniques for DIY car repair. This includes how to properly maintain your car to prevent frequent brake pad replacements, as well as how to troubleshoot any issues that may arise during the replacement process. By following our comprehensive guide to replacing brake pads, you will not only save money but also gain a better understanding of your vehicle and how to properly maintain it.
Remember, regular maintenance is key to ensuring your car stays in top condition and keeps you safe on the road. We hope this article has provided you with all the information you need to confidently replace your own brake pads. By understanding the search intent behind auto parts searches and providing thorough instructions and tips, we aim to make DIY car repair accessible for everyone.
Tools and Materials You Will Need
Before getting started, make sure you have all the necessary tools and materials on hand. These may include a jack, lug wrench, brake cleaner, new brake pads, and more. Refer to your vehicle's manual for a complete list of recommended tools and materials.When to Replace Brake Pads
Use HTML structure with brake pads only for main keywords and for paragraphs, do not use "newline character".Knowing when to replace your brake pads is crucial for maintaining your car's safety and performance. Here are some signs that it may be time for a brake pad replacement:
Choosing the Right Brake Pads
When it comes to replacing brake pads, it's important to choose the right ones for your vehicle. This means considering factors such as material, size, and compatibility with your specific car model. Here are some things to keep in mind when selecting brake pads:-
Material: The material of the brake pads can greatly affect their performance and longevity.
Ceramic brake pads are known for their durability and low noise level, while semi-metallic pads provide better stopping power. Consider your driving habits and needs when choosing the material.
- Size: It is crucial to choose brake pads that are the correct size for your vehicle. Using the wrong size can lead to decreased braking efficiency and potential damage to your car.
- Compatibility: Different car models require different types of brake pads. Make sure to check the compatibility of the pads with your specific car model before making a purchase.
Tips and Techniques for DIY Brake Pad Replacement
Replacing brake pads can be a daunting task, especially for those new to DIY car repair.Here are some tips and techniques to keep in mind to make the process smoother and more efficient:1.Gather all necessary tools and materials: Before starting the replacement process, make sure you have all the necessary tools and materials on hand. This includes new brake pads, a jack, lug wrench, brake cleaner, and a C-clamp.
2.Follow safety precautions:
When working on your car, always prioritize safety. Wear protective gear such as gloves and eye protection, and make sure your car is parked on a flat surface with the parking brake engaged.3.Refer to your car's manual:
Different car models may have slightly different processes for brake pad replacement. Always refer to your car's manual for specific instructions.4.Clean the area:
Before removing the old brake pads, use brake cleaner to clean the area around the brake caliper.This will help prevent any dirt or debris from getting into the new brake pads.
5.Use a C-clamp to compress the caliper:
After removing the caliper bolts, use a C-clamp to compress the caliper piston. This will make it easier to install the new brake pads.6.Install new brake pads:
Place the new brake pads onto the caliper bracket and secure them with the retaining clips or pins.7.Double check everything before driving:
After completing the replacement process, make sure all bolts and screws are tightened properly and that the brake pedal feels firm before driving your car.Step-by-Step Guide to Replacing Brake Pads
Now, let's dive into the steps for replacing your brake pads. Follow these instructions carefully to ensure a successful brake pad replacement:Step 1: Gather MaterialsBefore starting, make sure you have all the necessary materials. This includes a jack, jack stands, lug wrench, C-clamp, brake cleaner, new brake pads, and potentially new brake rotors if needed.Step 2: Prepare Your Vehicle
Park your car on a flat surface and engage the parking brake.Loosen the lug nuts on the wheels where you will be replacing the brake pads.
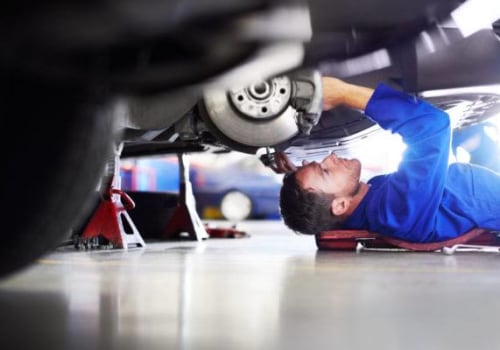
Step 3: Lift and Secure Your Vehicle
Use the jack to lift your vehicle and place jack stands under the frame for added support. Then remove the wheels.Step 4: Remove Old Brake Pads
Locate the brake caliper and remove the bolts holding it in place. Then carefully remove the caliper and old brake pads.Step 5: Clean and Inspect
Clean the brake caliper and rotor with brake cleaner. Inspect the rotor for any damage or wear and replace if necessary.Step 6: Install New Brake Pads
Place the new brake pads in the caliper and secure it back onto the rotor.Use a C-clamp to compress the caliper piston if needed.
Step 7: Repeat on Other Wheels
Repeat these steps on each wheel where you are replacing the brake pads.Step 8: Test and Adjust
Put the wheels back on and tighten the lug nuts. Lower your vehicle and test the brakes to ensure they are functioning properly. Adjust as needed. By following these steps, you can successfully replace your own brake pads and save money on costly repairs. Remember to always consult your car's manual for specific instructions and safety precautions. Replacing brake pads may seem like a complicated task, but with the right knowledge and tools, it can easily be done at home.By understanding the search intent behind auto parts searches and following our step-by-step guide, you can confidently replace your own brake pads and save time and money in the process.